Ender 3 Build Pro: SKR v1.4 Turbo w/ TMC2209 and BMG (work in progress)
21 Jan 2020
Table of Contents
- Summary
- Configuration
- Ender 3 Initial Build
- First Print
- BMG Bracket
- SKR v1.4 Turbo Software
- SKR v1.4 Turbo Hardware
- Results and Calibration Prints
Summary
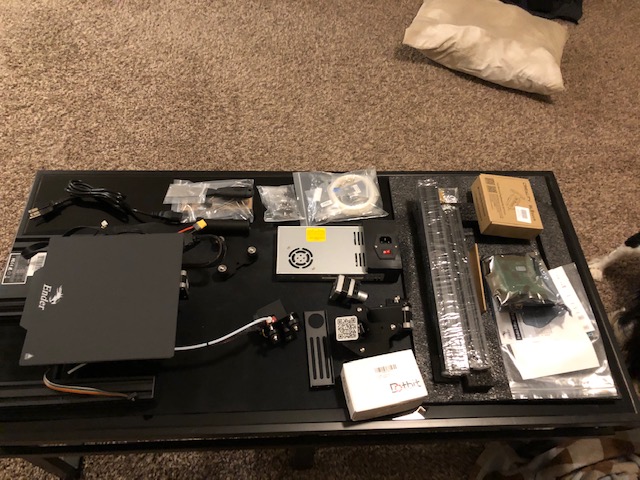
My Ender 3 Pro arrived last week and I figured I could give an electrical engineer’s persective of assemblying and customizing a 3D printer while being able to provide a great resource for people with zero embedded systems experience; so here you go internet. Recently an opportunity arose where I needed to add a 3D printer to my collection of hardware prototyping tools. I scoured reddit and found that the Ender 3 was a great entry level printer that wouldn’t break the bank. So I ended up purchasing an Ender 3 Pro, a SKR v1.4 Turbo w/ TCM2209 stepper motor drivers, a clone of the BMG Extruder, a sprint steel bed with a PEI sheet on it, orange bed springs, and a BLTouch for auto bed leveling.
- Ender 3 Pro
- I went with the Pro over the basic model becuase I have delt with faulty power supplies in the past and am very familiar with the U.L certification process, so I knew going with the upgraded power supply would be worth the extra investment.
- SKR v1.4 Turbo w/ TCM2209
- SKR v1.4 Turbo: So far it has been a great board. Simple to install and get up and running. Documentation is lacking though. Also there is currently no support in Klipper for this board as they changed the pinout between the v1.3 and this. Debating on whether or not I’m going to dive into the Klipper source and make the changes myself.
- TMC2209: Absolutely shocked at the volume difference from the stepper motors! Might have to rip open the Mean Well power supply and quite that fan now.
- BMG Extruder Clone
- The BMG extruder (clone) was recommended by quite a few people as a great upgrade and since the stock extruder intake appeared to be a rather fix it now than later component, I opted for the BMG over the metal variant of the stock extruder.
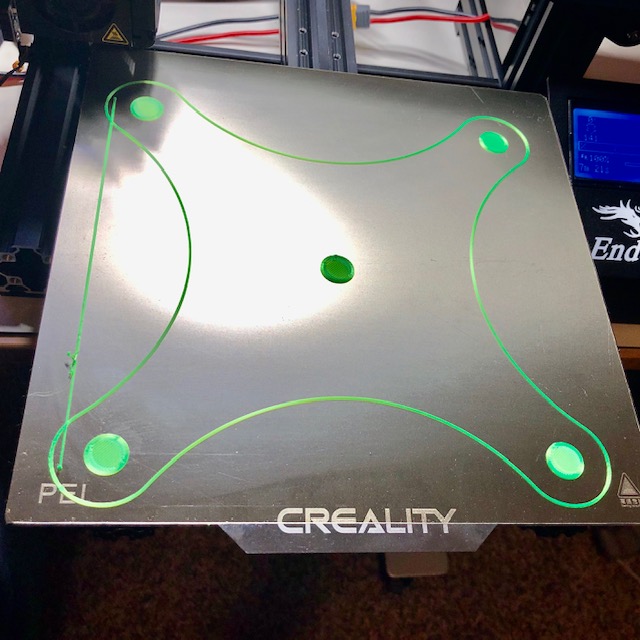
- Spring Steel Bed w/ PEI
- Definitely worth the upgrade! I clean it with isopropel after each print and have yet to have adhesion issues.
- Stiffer Springs
- Installed immediately and haven’t had to level the bed since the first time. Debating on returning the BLTouch since these work so well and my bed appears to not be warped.
- BLTouch
- I have yet to unbox this auto bed leveling device. I’ll update this tutorial if I decide to install it.
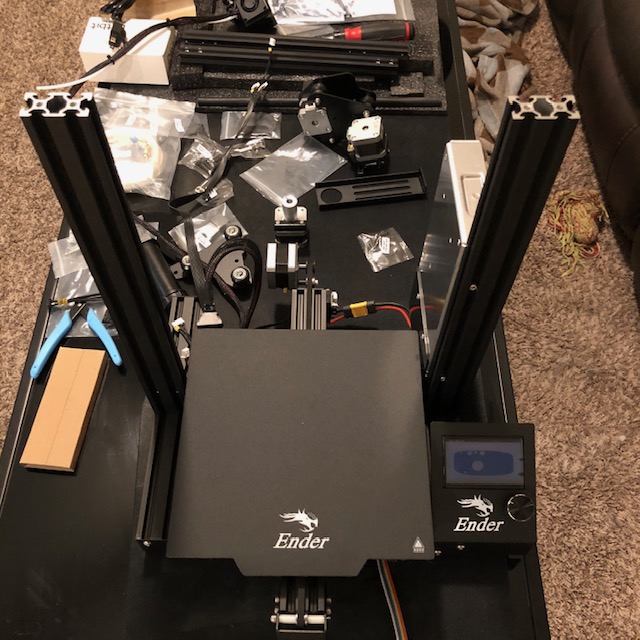
Ender 3 Initial Build
The build was pretty straight forward using the intructions provided by the manufacture.
 There’s really not too much to say about this part of the build, I’m sure there are plenty of tutorials online for anyone who has issues putting the physical hardware together, but I figured I should mention the one issue I ran into.
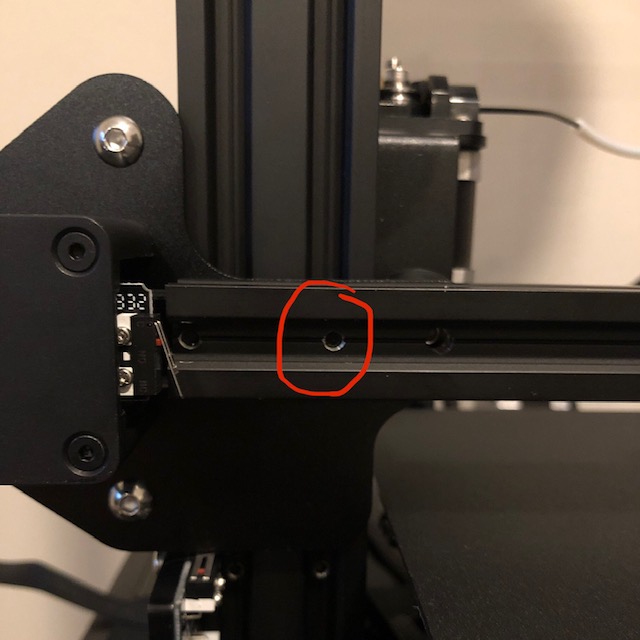
 I wanted to make sure the printer was very tight and I found the alluminium pretty soft to the point I completely stripped one of the two holes that connects the x-axis motor bracket to the cross-member.
 The screw went into the back side of the circled hole. I left it stripped and haven’t replaced it with a longer screw that would thread through the other side of the extruded alluminium cross-member, but this is on the todo list for sure.
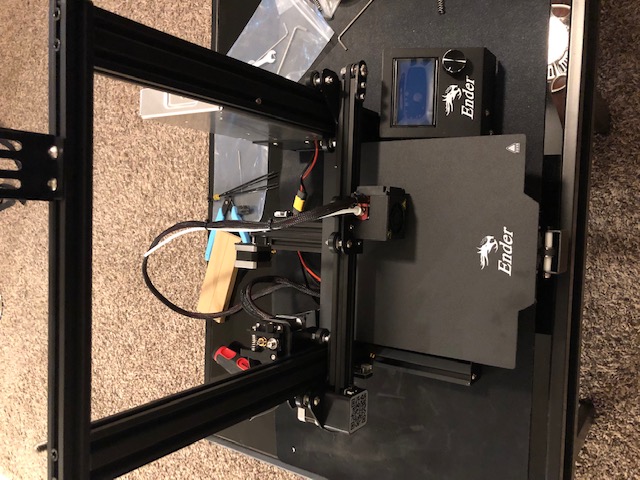
 Other than that, I was able to build the printer, power it up, and start my first build within 1 hour.
First Print
I chose a baby yoda as my first print using the recommended slicing settings, but completely did not see that I needed to turn on supports, so baby yoda’s right hand is pretty jacked but the print came out far above my expectations.
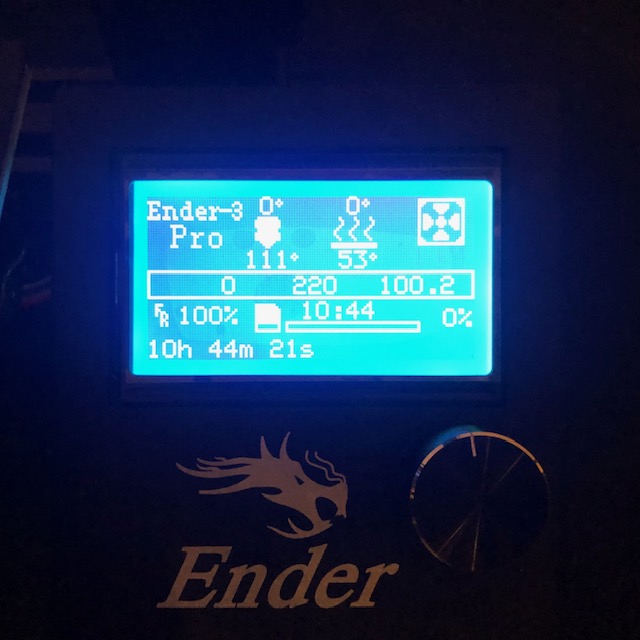
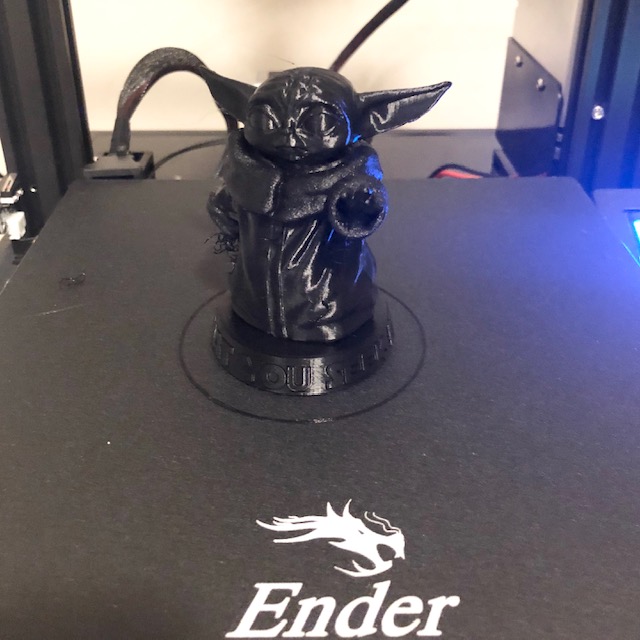 It took about 10 hours and 45 minutes on a completely stock Ender 3 Pro… and yes I left my printer running all night on the first print, but I slept next to it and my dog usually barks at fires I start in the house.
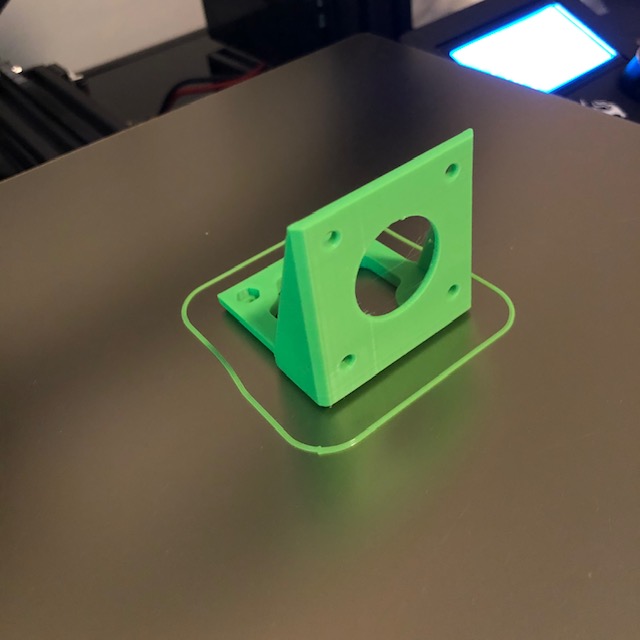
BMG Bracket
The next evening I looked at all the parts that had arrived and figured the BMG extruder looked like an easy install. After fiddling with the bracket location and not being able to get the extruder to fit properly, I hopped on over to amazon and the reviews mentioned needing a bracket to avoid having to file the extruder, so I printed this bracket.
 The stock Ender 3 Pro prints pretty nicely.
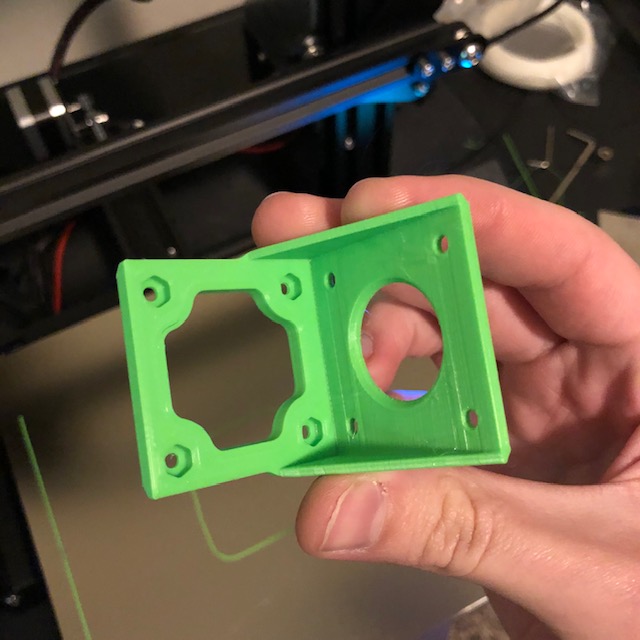 It’s fairly easy to install the bracket, I just used some M3 hardware I had laying around from my quadcopter builds.
SKR v1.4 Turbo Software
The software aspect of this project has been very straight forward for me as I am familiar with arduino, C, C++, and VS code. I know that it can be a very daunting task for someone who has not compiled microcontroller firmware before, but if you stick to the instructions and help from reddit and the appropriate githubs you can definitely make it work. I found the BIGTREETECH-SKR-V1.3 repo and saw there was a folder for Marlin-2.0.x-SKR-V1.4-Turbo. I did some diffs between the BIGTREETECH-SKR-V1.3/BTT SKR V1.4/Firmware/Marlin-2.0.x-SKR-V1.4-Turbo/config/default/Configuration.h and BIGTREETECH-SKR-V1.3/BTT SKR V1.4/Firmware/Marlin-2.0.x-SKR-V1.4-Turbo/config/default/Configuration_adv.h and the BIGTREETECH-SKR-V1.3/BTT SKR V1.4/Firmware/Marlin-2.0.x-SKR-V1.4-Turbo/config/examples/Creality/Ender-3/Configuration.h and BIGTREETECH-SKR-V1.3/BTT SKR V1.4/Firmware/Marlin-2.0.x-SKR-V1.4-Turbo/config/examples/Creality/Ender-3/Configuration_adv.h files and chose which #define’s to keep from the Ender 3 Pro file and the SKR files based on if the parameter seemed associated with a physical component of the Ender 3 Pro or if it appeared to be a controller based parameter. About 30 minutes later I had the basis for the configurations that I’m running right now I type this. I have tweaked a couple of parameters related to speed/acceleration, the BMG extrusion rate, and the SDCard (it would not let me mount it from the LCD so I enabled the SDCard being mounted at all times, which broke the USB interface being available to my PC, but it’s been working and I wanted to get it up and running ASAP). I’ve got my entire configuration available on my fork the the BIGTREETECH repo. If you have never compiled firmware before, the location of configurations that is actually compiled is at BIGTREETECH-SKR-V1.3/BTT SKR V1.4/Firmware/Marlin-2.0.x-SKR-V1.4-Turbo/Marlin/. I am using the platform.io extenstion within VS code to compile Marlin. Just use the tutorial on the Marlin github. There documentation needs to be updated though, after cloning the project in step 3, you’ll want to go back to the platform.io tab on the left and then the PIO Home tab on the top. Then chose Import Arduino Project, this will actually enable you to have the Build option in the left side bar like their step 4 shows.
SKR v1.4 Turbo Hardware
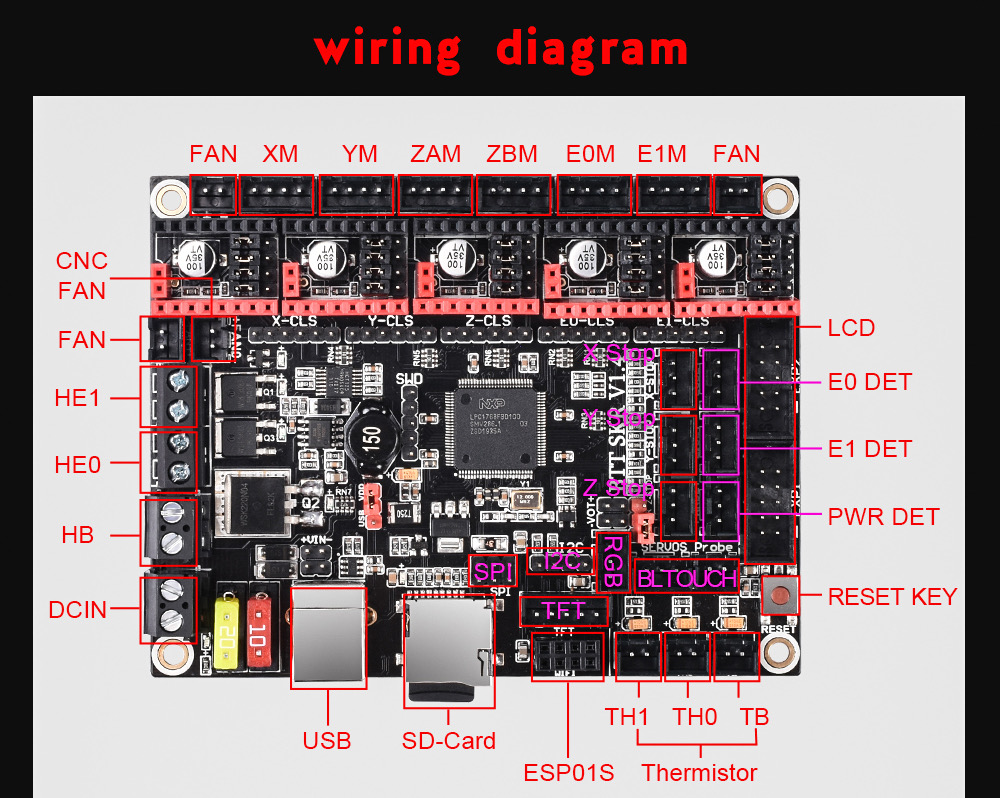
Alright, on to the hardware! Did I mention I love getting to play around with new hardware? So just a disclaimer, I only used the wiring diagram below and a multimeter to get everything connected. These are all the connections that I ended up using on the board starrting in the top left hand corner and rotating clock wise around the board:
- FAN -> Hot End Fan 0
- XM -> X-axis Stepper Motor
- YM -> Y-axis Stepper Motor
- ZAM -> Z-axis Stepper Motor
- E0M -> Extrudder Stepper Motor
- LCD -> Ender LCD
- X-STOP -> X-axis Stop Switch
- Y-STOP -> Y-axis Stop Switch
- Z-STOP -> Z-axis Stop Switch
- TB -> Heated Bed Thermocouple
- T0 -> Hot End Thermocouple
- SD-CARD -> SD Card Provided With Board
- USB -> Computer
- DCIN -> 24V Power Supply
- HB -> Heated Bed
- HE0 -> Heated Hot End
- FAN -> Hot End Fan 1
Note that there are a lot more connections than what I have made as of right now.
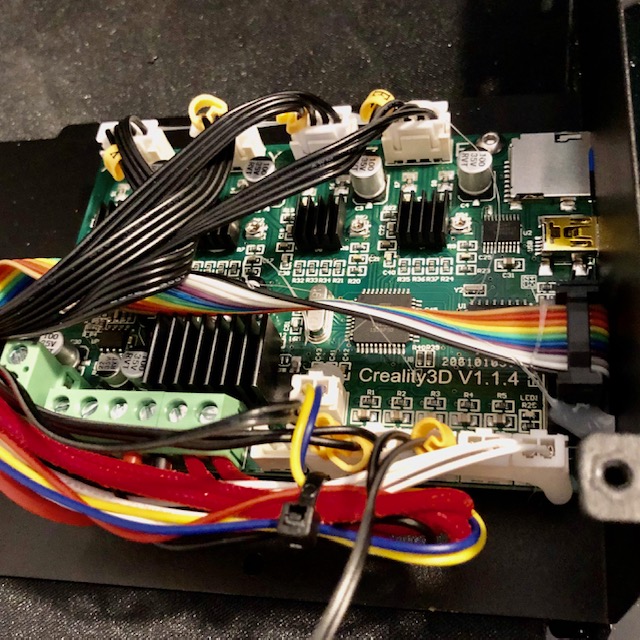
 Here is the stock Ender 3 Pro board which we will simply disconnect all the wires on the board. Most wires have connectors but a few have terminal blocks that you will need to unwire. Pay attention to what you remove and probably transfer them to the new board one by one would be the best bet. If you run into an issue remembering where something was connected just trace it back to the device that is connected to it. The x, y, and z axis motors and switches have little labels on them to make things easier.
 So someone out there might be wondering why I put the software section first and that is because I actually built the firmware and flashed the ARM MCU before I connected any extra hardware to the board. I didn’t know what firmware was on the board when I got it so I just played it safe. First I moved the jumper shown below to
 USBand then powered the board up by plugging it into my laptop. The SD Card enumerated as a USB disk and I copied myfirmware.binfile over and made a backup of theFIRMWARE.CURfile that already existed on the card and deleted it so onlyfirmware.binexisted on the card.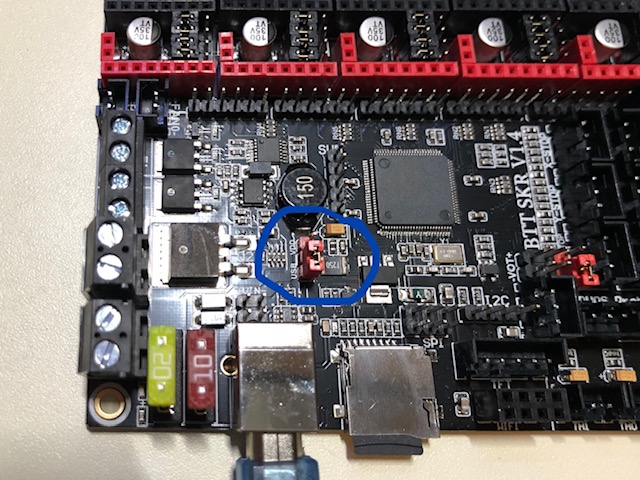 Next, I tested that the firmware was actually functional by plugging the LCD display from the Ender 3 Pro into the SDK v1.4 turbo and powered it up from my laptop’s USB port.
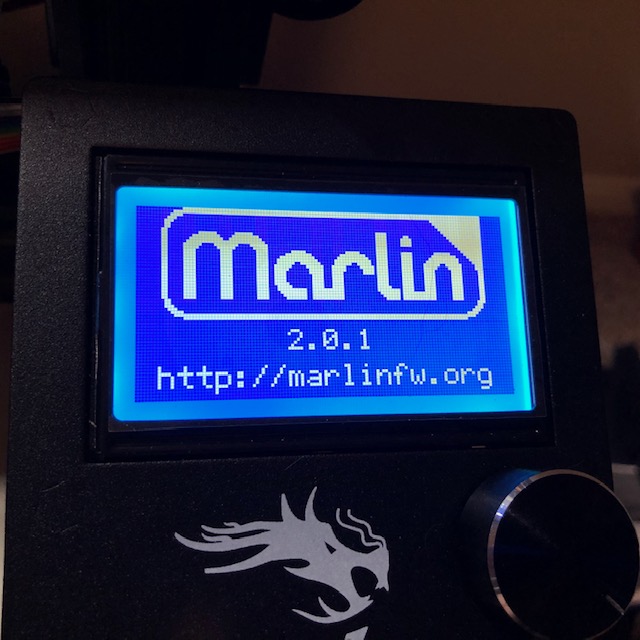
 I was then met by a good old blue led backlit liquid crystal display, simply beautiful, as one of my professors in school would say. So you can see that the firmware compiled and is functional, but whether it works and is configured correctly can only be determined by connecting some hardware. I chose to start with the x-axis stepper motor.
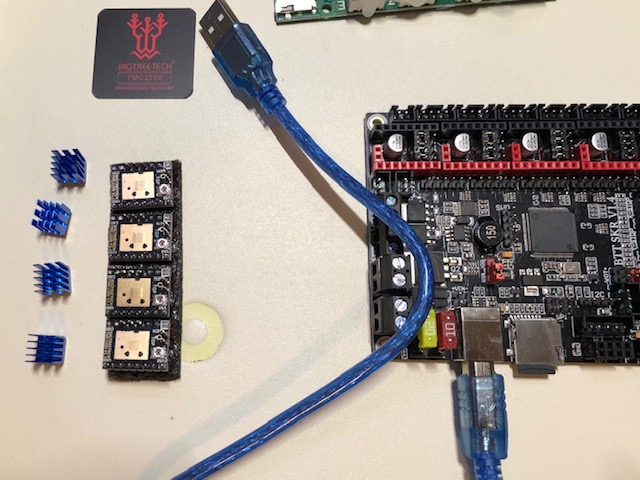
 Here are the TCM2209’s that came with the board. They did not have heatsinks installed by the factory. So let’s prep them to get installed.
 The heatsinks are super easy to install if you have never put one on before.
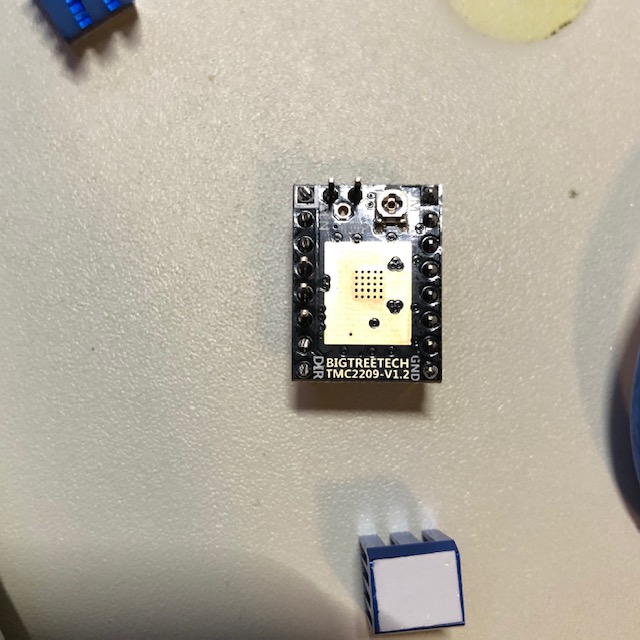 Just peel off the part that covers the sickiness of the tape and put it on and press down with some force. Do note that you’ll want the longer side of the heatsink to match up with the longer side of the pad on the board.
 Now there is an instruction manual that states
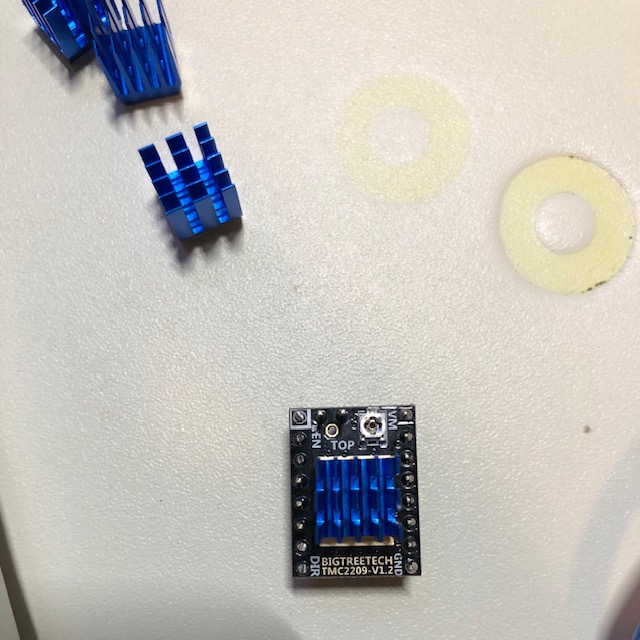
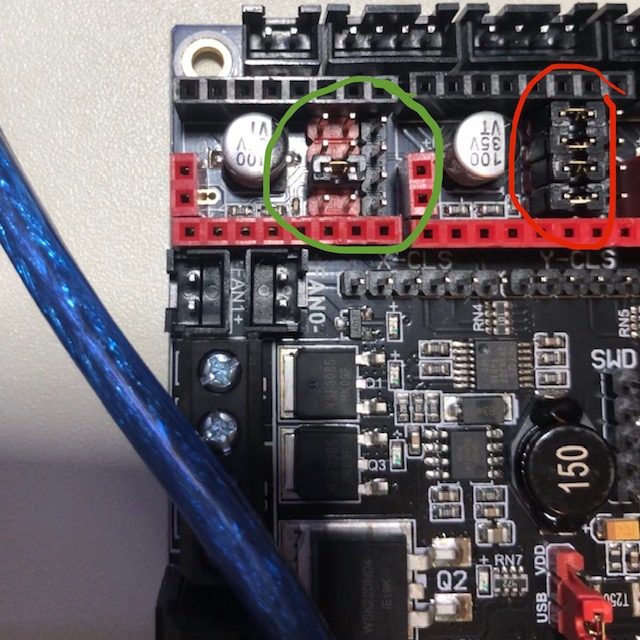
 Note: When using the TMC2209, if you don't use the stallguard function, you need to cut off the DIAG pin on the driver so that the mechanical switch can work normally.So I went with bending all the pins over instead of cutting them like the manual recommends. If you’ve never bent a header pin before, you only get 1 or 2 bends before they will snap off.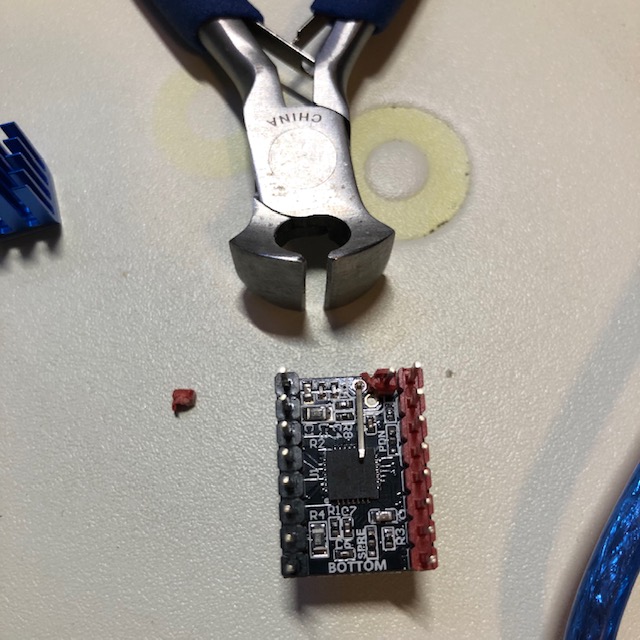 The board comes with all the jumpers set on the stepper motor drivers, so configure your jumpers like in the green circle for UART mode and you’ll be all set.
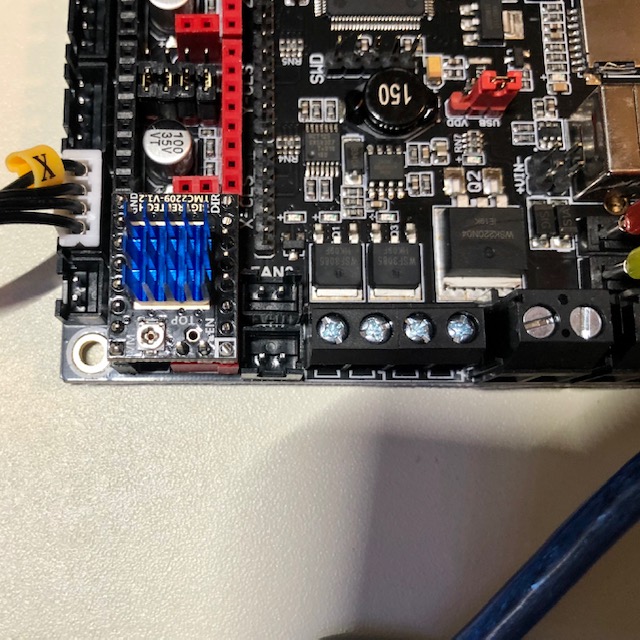
 I started with just the x-axis stepper motor instead of plugging everything in at once so I could isolate issues if there were any and reduce debugging time. I inserted the stepper motor into it’s socket and connected the stepper motor cable with an x label on it. After moving the red jumper back to VDD, (add connecting the power) I powered it up and attempted to move the x-axis via the LCD and voila! We’ve got a moving x-axis stepper motor!
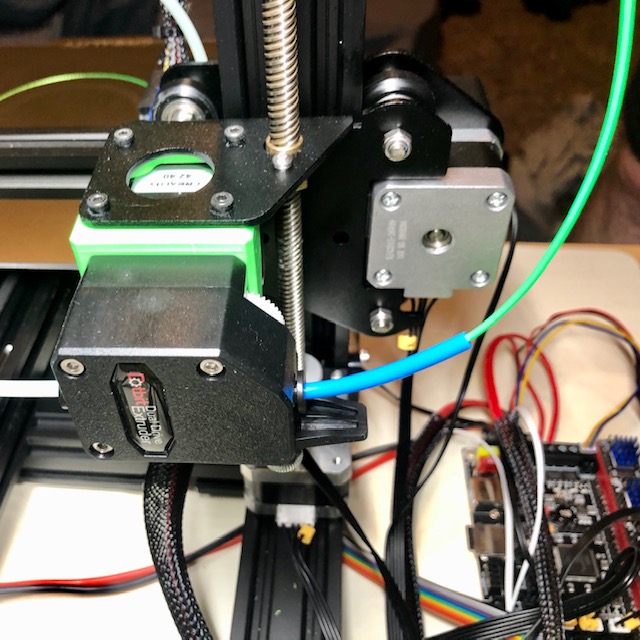
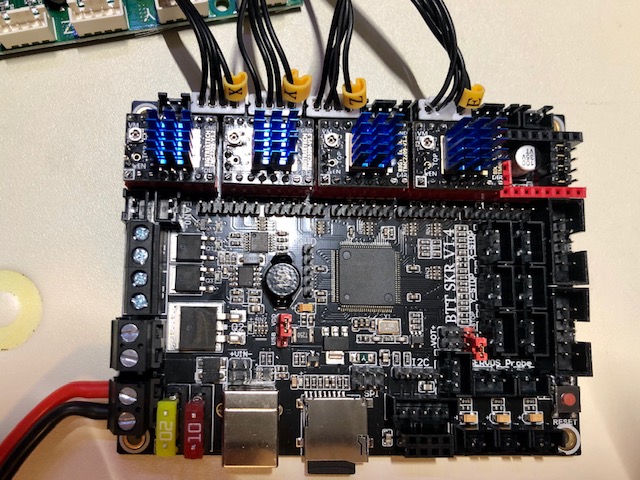
 I bent all the pins on the TMC2209’s and installed them along with their corresponding motors.
 The order that I connected everything was:
- LCD
- Power
- Stepper motors
- End Stop Switches
- Fans
- Heated Bed Thermocouple
- Hot End Thermocouple
- Heated Bed
- Heated Hot End
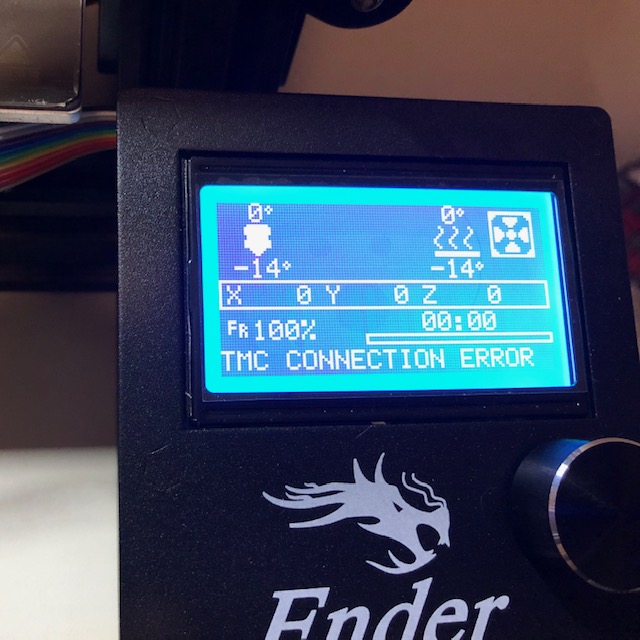
Note that I was still skeptical of the firmware configuration as it was my first attempt at compiling Marlin on a brand new board so I wired everything in steps testing each component individually before moving to the next one. After all the motors were connected the
TMC Connection Erroron the LCD went away. When connecting the thermocouples I saw the temperature was 22 C instead of the -14 C that is shown without anything connected. And when I connected the heating elements I increased their temperature and saw each increase, but made sure the wrong one didn’t increase as if I wired them wrong. I power cycled between each component being wired up and did not just hot plug while the board was powered… please don’t do that.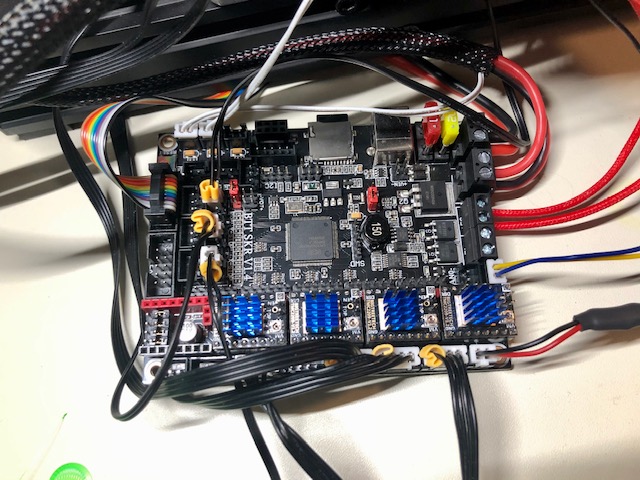 And wiring complete!
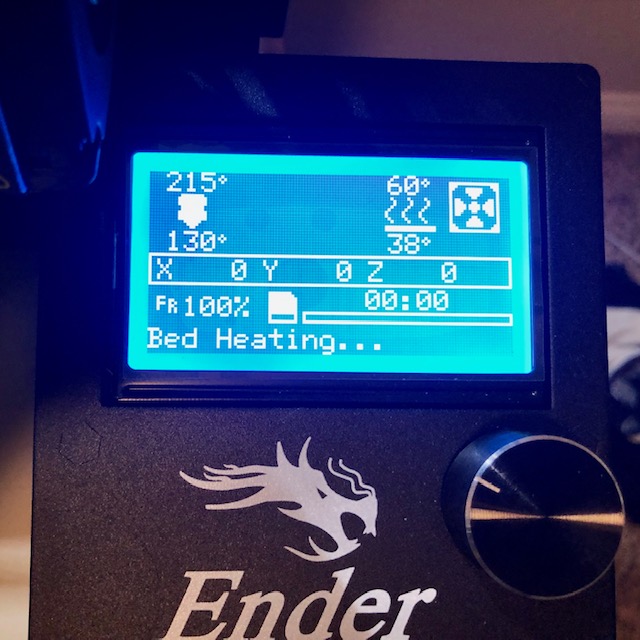
 You can see here that hot end and bed are heating and their thermocouples are working.
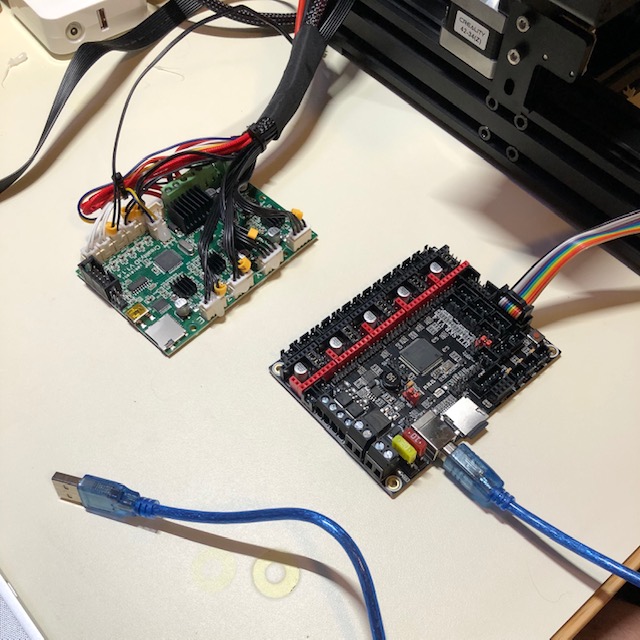
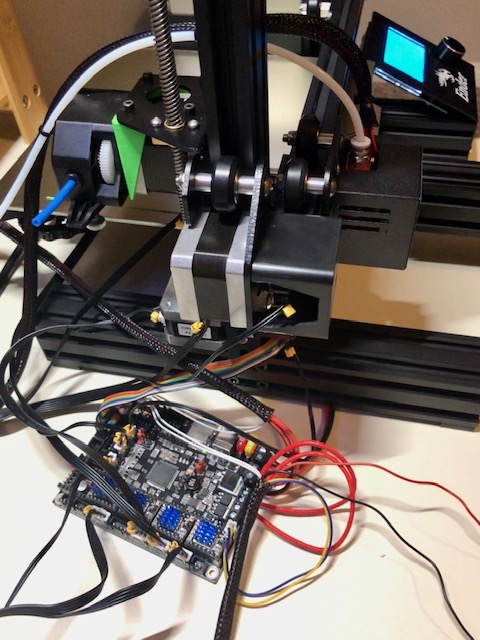
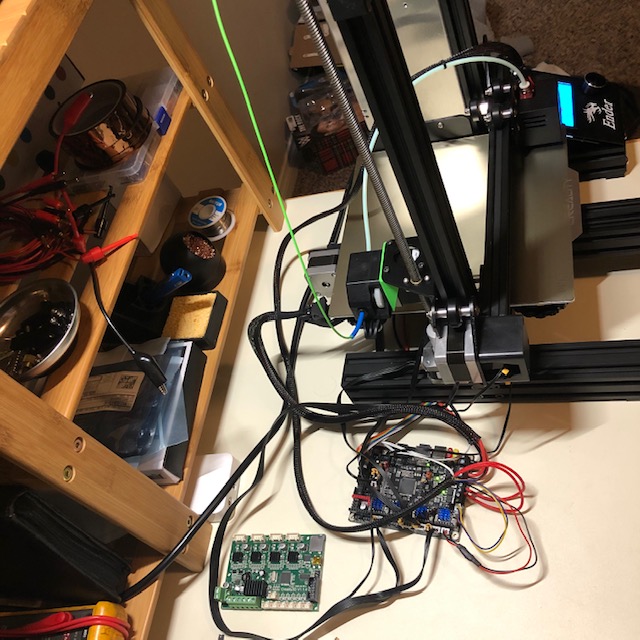
 Now I need to print a case to house this sweet new board and my octopi, but for now she’s going to just sit like this on my anti-static mat.
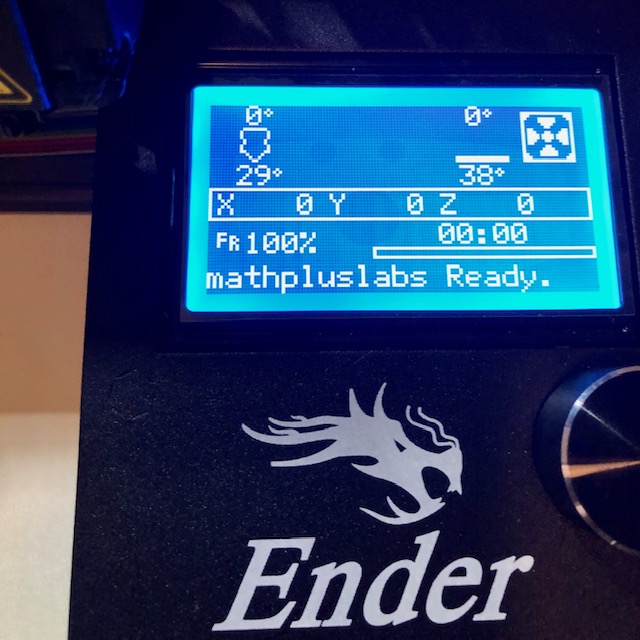
 Oh and if you use the firmware from my fork, you might want to change the display a bit ;)
Results and Calibration Prints